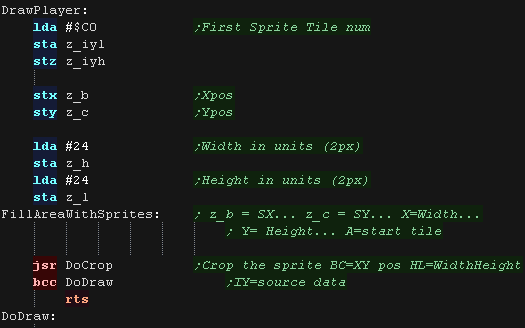
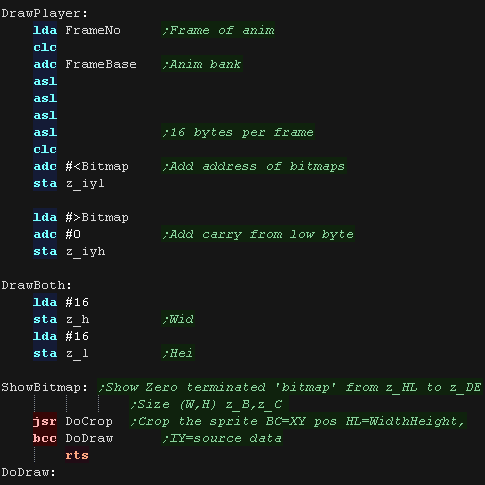
Our cropping routine will work out the X,Y pos in bytes, and width
and height + any skipped pixels from the source data
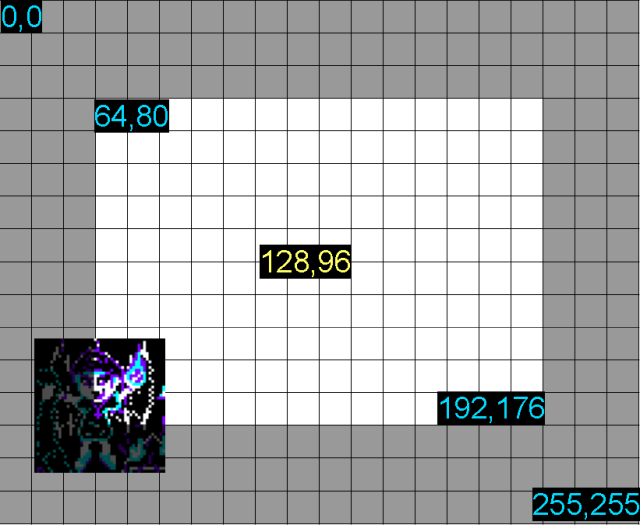
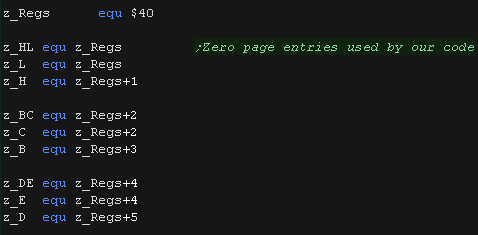
Zeropage pair z_bc is the X,Y co-ordinate in logical units
Zeropage pair z_hl is the Width,Height in logical units
Zeropage pair z_iy is the source bitmap address of the sprite data
First we zero z_DE - it's used for temp values, and spritehclip
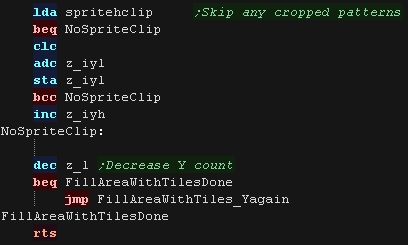
which is used for the horizontally skipped bytes after each line |
 |
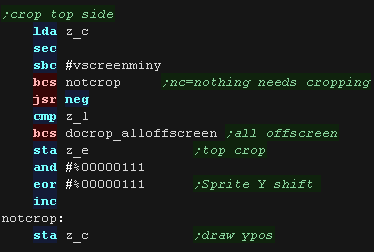
Ok... lets crop the top of the sprite...
First we remove the ypos of the first visible pixel... if the result
is greater than zero, then nothing is off the screen at the top.
if the result is less than zero we need to crop...
we convert the negative to a positive and compare to the height of
our sprite, if the amount to crop is not less than the height then
the sprite is completely offscreen.
If the top line is partially off the screen we need to convert the
ypos so the sprite starts partially offscreen, we do this with EOR
#%00000111
|
 |
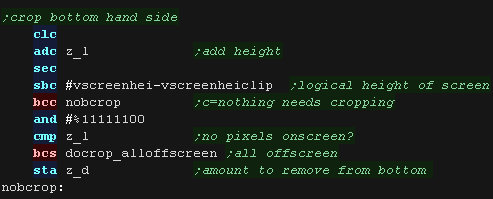
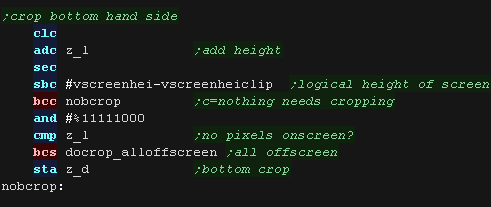
Next we do the same for the bottom,
We add the height to the Ypos, and subtract the height of the
logical screen, if it's over the screen height (greater than zero)
we need to crop again - the result is the amount to crop
We need to convert it to a number of sprites (8 logical units) with
AND #%11111000
|
 |
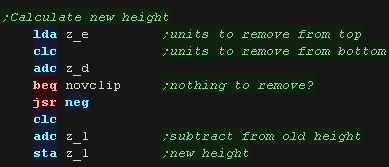
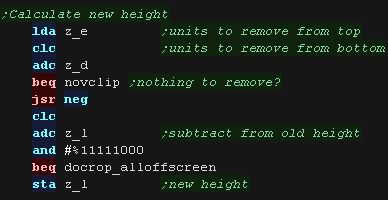
| We've calculated the top and bottom crop... we now use these to
calculate the new height of the sprite. |
 |
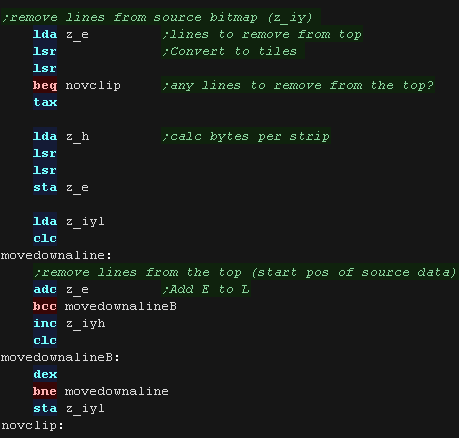
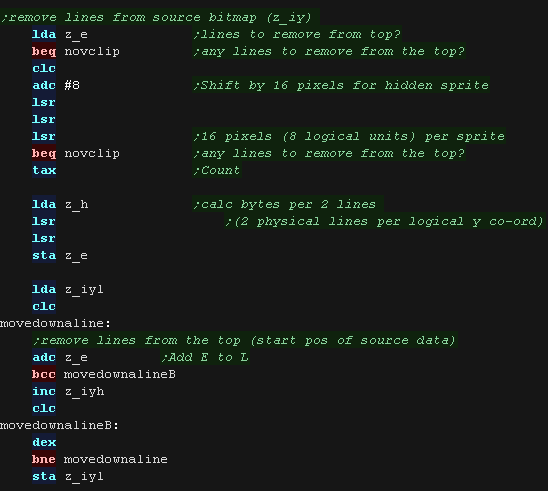
We then skip over any bytes in the source (z_iy) based on the
number of lines we need to remove from the top.
We add 8 to the amount to remove, as we're overstating the size of
the screen by 8 logical units to allow for the 'partially offscreen'
sprites drawn at the top.
|
 |
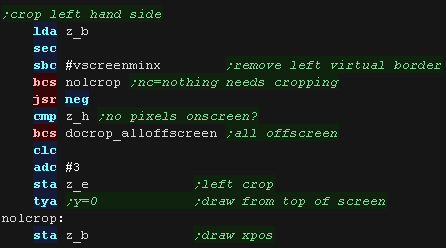
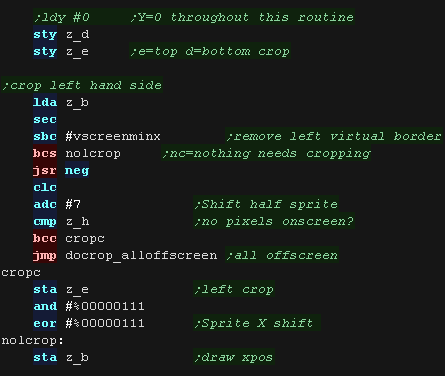
now we do the same for the X axis
First we remove the xpos of the first visible pixel... if the result
is greater than zero, then nothing is off the screen at the left.
if the result is less than zero we need to crop... we convert the
negative to a positive and compare to the width of our sprite, if
the amount to crop is not less than the width then the sprite is
completely offscreen.
Anything else is the number of lines we need to remove from the
left, we store this in z_e and adjust the starting draw with an EOR
#%00000111 to correct the starting position to adjust for the
removed sprites
|
 |
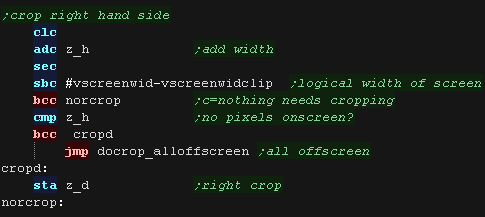
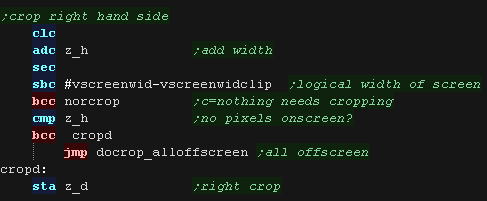
Next we do the same for the right,
We add the width to the Xpos, and subtract the width of the logical
screen, if it's over the screen width (greater than zero) we need to
crop again - the result is the amount to crop |
 |
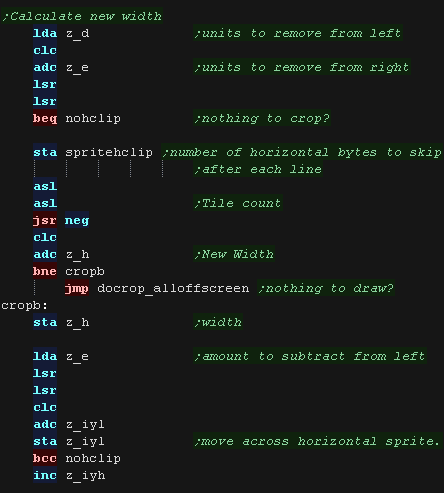
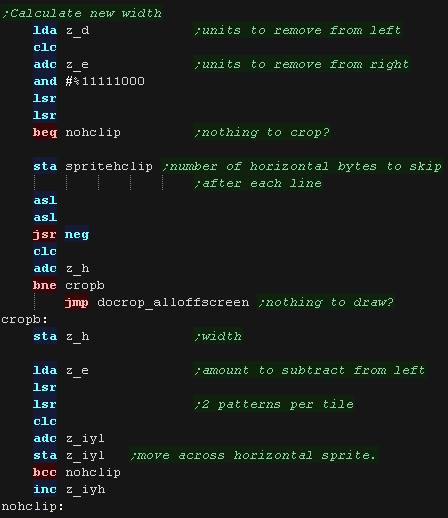
We've calculated the left and right crop... we now use these to
calculate the new width of the sprite.
We then skip over any bytes in the source (z_iy) based on the number
of bytes we need to remove from the left. |
 |
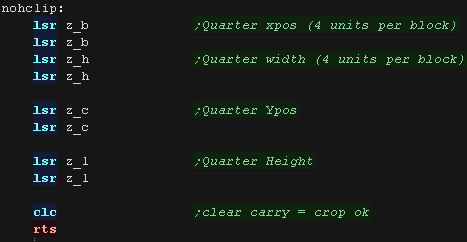
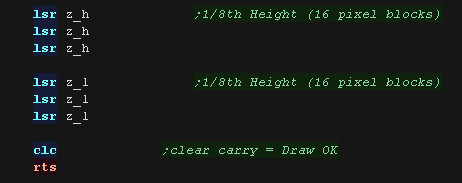
We've finished cropping our sprite!... but we need to convert our
co-ordinates from logical units to a sprite count -
effectively dividing Width and Height by 8
We leave the X,Y pos in logical units, we convert these later.
We clear the carry to tell the calling routine we cropped the sprite
successfully (it needs drawing) and return. |
 |
| If the sprite is completely offscreen, there's no point trying to
draw, so we set the carry and return |
 |