

Hello World Series
 |
Lesson
H1- Hello World on the TI-84 Lets take a look at a minimal example on the TI-84 |
 |
 |
|
 |
Beginning a program
| We need to ensure the assembler knows we are in eZ80 mode by
setting ADL=1 To start our program, we need our code to start at $D1A881 , but we need a 2 byte header with the bytes $EF $7B The IY register is used by the firmware, so we change it at our peril!... we back it up onto the stack at the start of our program. We then clear the screen $020810 (_ClrScrnFull) and reset the cursor pos using firmware function $020828 (_homeup) |
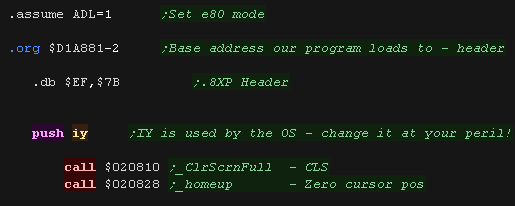 |
| When we finish our program, we just use a RET command to return to the OS |  |
Printing a character to the screen
| We'll use two firmware
routines to do our character work, "PutC" ($00207B8) will print
the character in the accumulator to the screen, "_newline" (
$00207F0) will move down a line. We define these as symbols, so we can use them easilly. |
 |
| Because we now have the ability to print a character, we can
extend this into a function to print whole strings. Our code prints a string that is ended with a 255, we just pass the string address in HL |
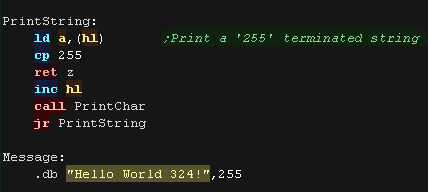  |
| This can be used to show a test string to the screen | 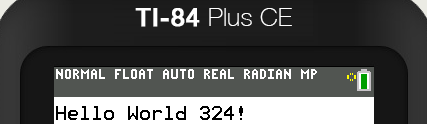 |
The Monitor Tools
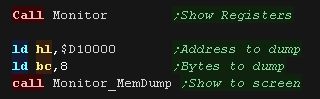
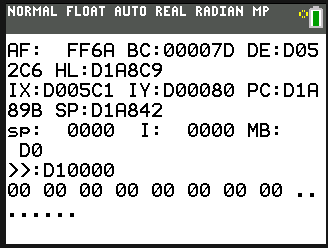
| As a bonus, we can include the Monitor functions we wrote in the
multiplatform series, These allow us to show the Z80 registers, or parts of the system memory for debugging purposes |
 |
| This adds 2 new functions... Monitor shows all the registers... Monitor_MemDumpDirect shows part of the memory... it shows BC bytes from address HL |
 |
| Due to the small screen*, the Monitor isn't very useful, but
it's always there if you need it! |
 |
 |
The Limited
screen space means these monitor tools aren't a lot of use They
were designed for the 'bitmap font' example in the platform
series, which used a smaller font. |
Creating a valid executable file
In these tutorials we use SPASM
to compile, we need to specify various parameters. First, We need to specify a Source file, Next we specify a Destination - this is a binary, but we'll need to convert it to an 8xp later We need to enable eZ80 mode Finally we specify a Listing file - this is for debugging and contains output which may help us if we have trouble. We're also specifying to ignore case sensitivity, and check for labels that look like commands |
|
if we're using Cemu.exe, we can get the
emulator to automatically transfer the new command  In this example we're specifying the complete 8xp to execute We specify the rom file to use, We're also specifying a config file on the command line. |
|
| To start a program we need to press the prgm button |  |
| Select the program we just assembled | 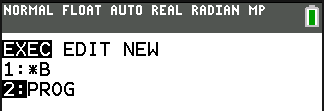 |
| If we don't want to use the command line, we can also transfer our program via drag and drop. | 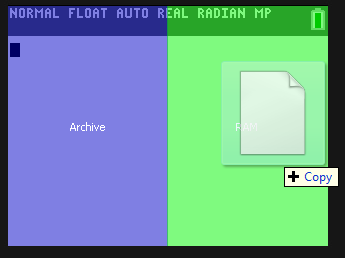 |