| We're going to start a cartridge... First we need to turn 'Padding Off' - Padding is where the assembler automatically adds zero bytes automatically - it will make things difficult, so we'll turn it off. We need to put a fixed header word 'AA01' - this defines the cartridge start... Next we need a pointer to our program for the main menu - and a name of the program (LearnAsm.Net) The fixed values here will work fine for all our programs |
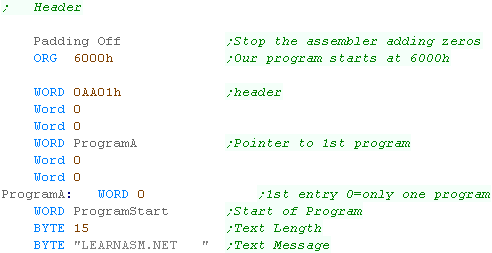 |
| As well as the header - we need the start of our program... First we turn of the interrupts with LIMI Next we need to define some memory to use for our register r0 - r15 - we're using ram address 83C0h so the 16 two byte registers use up to 83FFh |
 |
| We now have a menu item for our program!... when we select it, label ProgramStart will run! | 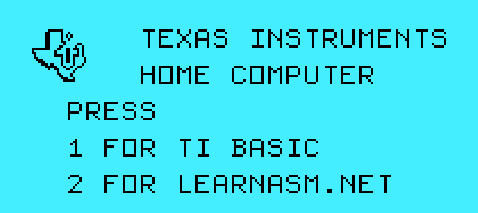 |
| Our
cartridge only has a single program, the format can support more
than one, but it's not something we'll look at here. |
 |
Setting up our screen.
| When the computer starts, the screen is in character mode - and
each byte of VRAM is a chacacter tile (from VRAM address 0000h
onwards)... To select a WRITE address we add 4000h to this ... and write to address &8C02h... we write the L byte first 00h... then the high byte 40h To allow for Newlines, we need to count how many horizontal characters we've printed - we use CursorX to do this - here we reset it to zero. |
 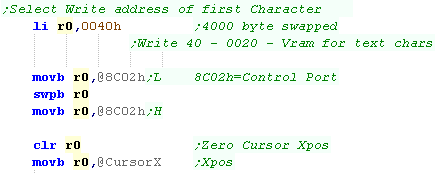 |
Printing a character to the screen
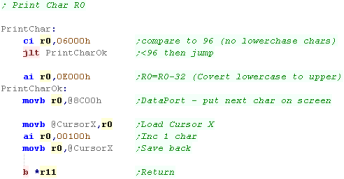
| Ok, we need to print a character to the screen... once we've
selected a vram address with port 8C02 - we can write bytes to the
screen with VRAM address 8C00 - these will appear as characters ...
but there's a problem! Characters over 96 (60h) are lowercase - and our font doesn't have lower case characters... we solve this by comparing to 6000h (top byte 60h=96) - and add E000h - effectively subtracting 32 from the byte - converting to lowercase. We add 1 to the byte in CursorX - as we've moved across the screen. |
 |
Using our PrintChar to print a string
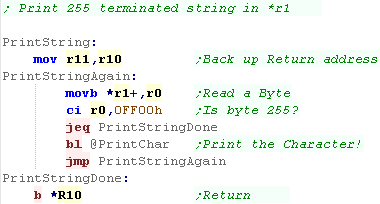
| We're going to write a simple string printing routine, it prints a
255 terminated string. All we do is read in bytes from *R1 until we get to a 255, at which point we return... we print all other characters with our PrintChar routine |
 |
| To print the string, just load R1 with the address of the string,
and call the function NOTE!: we need to make sure we're aligned on an EVEN byte for the rest of the program code - so we put 'Align 2' after our bytes .... note, if we'd left PADDING ON, we wouldn't need the 'Align 2' |
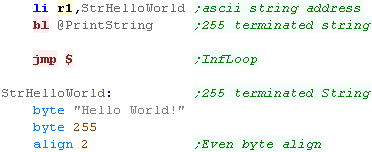 |
| This will show 'Hello World' to the screen |  |
NewLine
| We've counted how many characters we've printed to the screen - in order to start a NewLine, we just need to print spaces until we reach the end of the line (32 characters) | 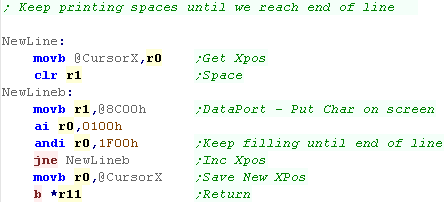 |
Building the ROM
| We build our rom with Macro
AS (ASW) Here is the script I use... We specify the source asm (%1 in my batch file) We specify our CPU type as TMS9900 We specify to output a listing file - this is handy for debugging. We tell the assembler to define a symbol 'BuildT99' (Some of my multiplaform programs use this) We output a Build file prog.bld - but this needs converting before we can use it as a rom!  Once the build completes - we need to convert it to a binary  We can then start the ROM with our emulator (Classic99):  |
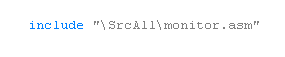
| As an added bonus we can include the 'Monitor Tools' we developed
in the multiplatform series. These allow us to show the registers or parts of the Ram for testing and debugging purposes |
 |
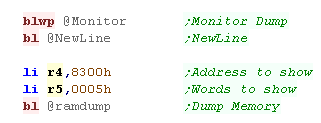
| This gives us 2 commands... Monitor shows all the registers, RamDump will show R5 bytes from address R4 to the screen |
 |
| We can see the result onscreen. | 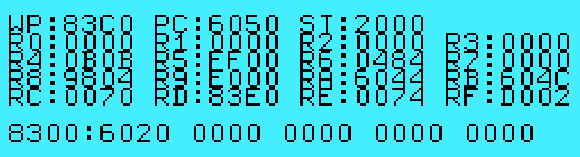 |
 |
We've got some basic screen routines, a
memory dump and register dump... we can use these as 'building
blocks' for making and testing something better. |