
Lets take a look at more of the MSX2 source... this time the Title screen and main game code


See
SuckHunt
folder

|
Lesson
SH21 - MSX2 code Part 3 - Title and Game code Lets take a look at more of the MSX2 source... this time the Title screen and main game code |
|
See
SuckHunt
folder
|
|
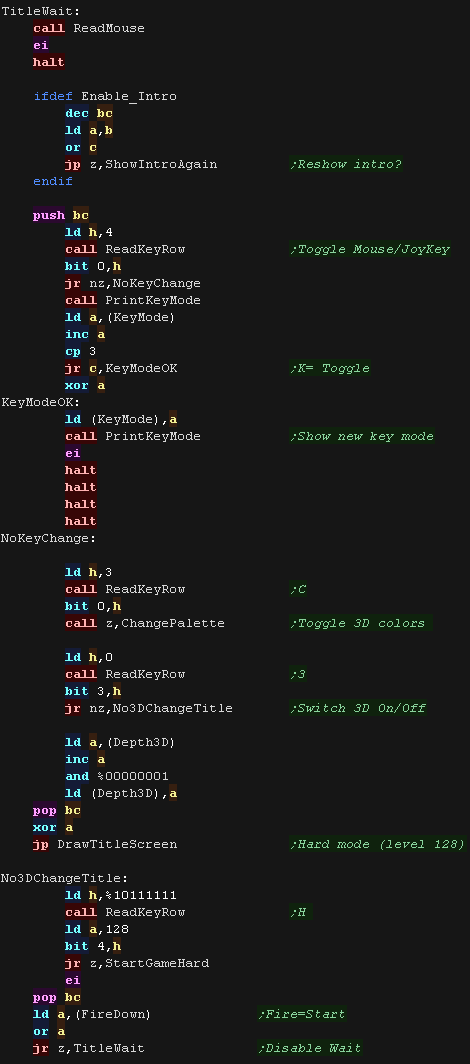
The title screen
| The Title screen is relatively simple, it waits for the player to
start the game, but it has a few tricky parts! BC is used as a 'timeout' - when it reaches zero the intro shows again. The 'K' Key toggles Key control method (Cursor joystick / Mouse) The 'C' key can be used to change the palette, this changes the 3D glasses type '3' can be used to toggle 3D On/Off... as there's a different titlescreen graphic for each, we have to redraw the title screen after making the change. 'H' can be used to start in 'Hard mode' - this sets the first level to number 128 (in the accumulator) When the player presses Fire, the game starts. |
 |
| When the game starts we set the first level number from A We start the main level music, and clear all the game variables to the defaults (NewGameData) |
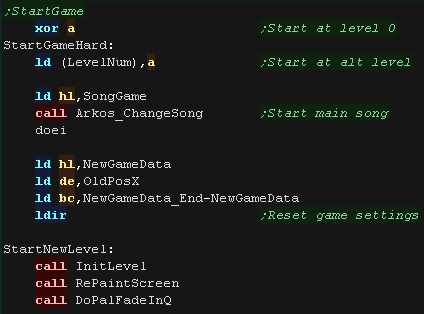 |
| The Level starts by setting up the sprites (enemies) and drawing
the screen |
 |
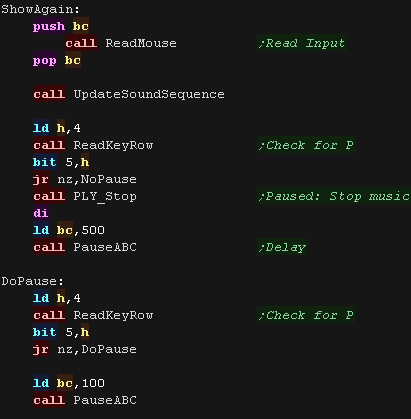
The main loop
| At the start of the main loop we process mouse input. update the SFX - this updates the sequence of any sound effect. Next we check the 'P' button and pause the game if it's pressed... there's a short delay, then we check for another 'P' to unpause. |
 |
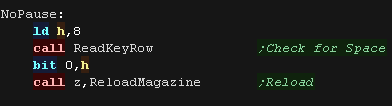
| Next we check the reload key (space) and reload if pressed |
 |
| Next we check the cursor speed key (C) - if it's pressed we toggle
between the 4 speeds. We load in the new speed from the CursorMoveSpeeds array, and store in CursorMoveSpeed - This is used during the interrupt handler |
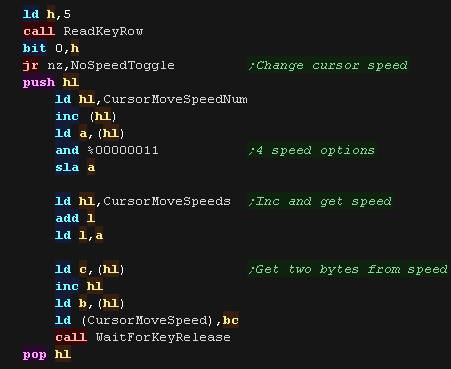 |
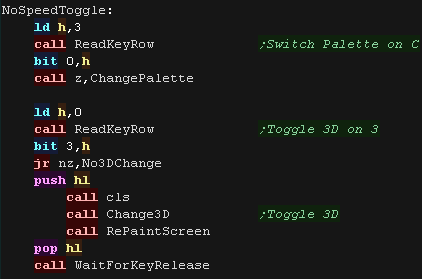
| Next we check the Palette and 3D toggle options. |
 |
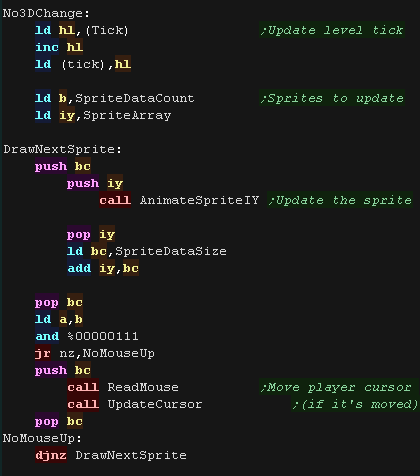
| We update the 'Tick' ... this is used to calculate the updates to
the sprites - as most sprites update every few ticks. We then process each of the sprites, updating their position and Sprite. After every few sprites we check the Mouse cursor, and update it as needed (to keep the cursor movement smooth) |
 |
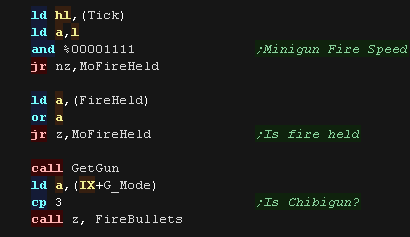
| The 'Chibigun' (minigun) is a fully automatic weapon, so fires
every few ticks while fire is held... We check the tick, firestate and current gun to see if the Chibigun is firing. |
 |
| Next we check fire 2, and reload if required | 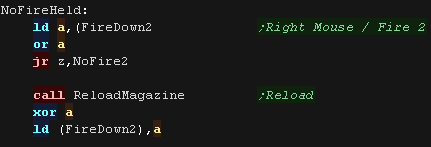 |
| We check fire 1, and fire the regular bullets if required | 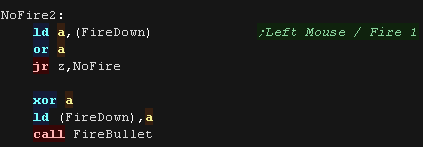 |
| Finally we update the cursor and repeat. |  |
 |
Because the SMS doesn't have a bitmap mode
we'll have to use the tilemap for graphics. Unfortunately it also can't do XOR - so we'll have to flip between the two screens and rely on persistance of vision of the CRT for the combined 3d effect.... you're using a CRT, right??? |
Shutters and interrupts
| We need to use two tilemaps, one for each eye. We'll switch them during the interrupt handler. |
  |
| We actually have two interrupt handlers... an IM1 interrupt handler at &0038 to handle the lightgun and Page flipping, and one at &0066 to handle the pause button! | 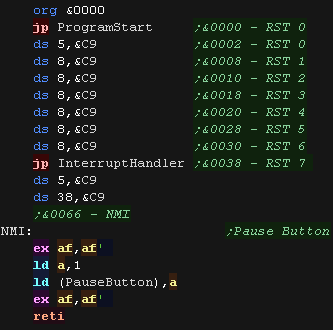 |
| First during the interrupt handler we check if the light gun fire
was pressed. If it was, we change the palette to white, and scan until we find the Y line the gun is pointing to by checking &7E, we then read in from &7F to get the horizontal position of the lightgun. |
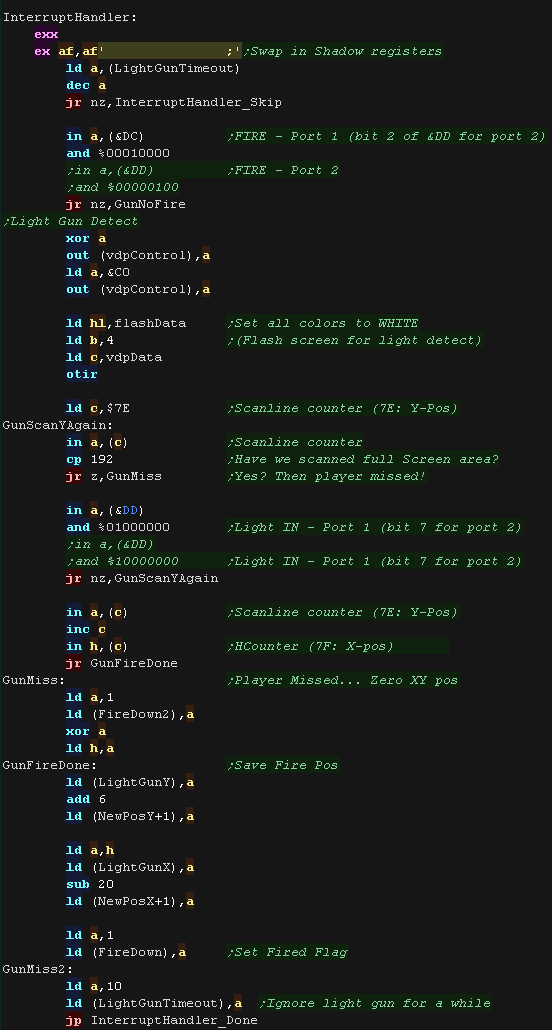 |
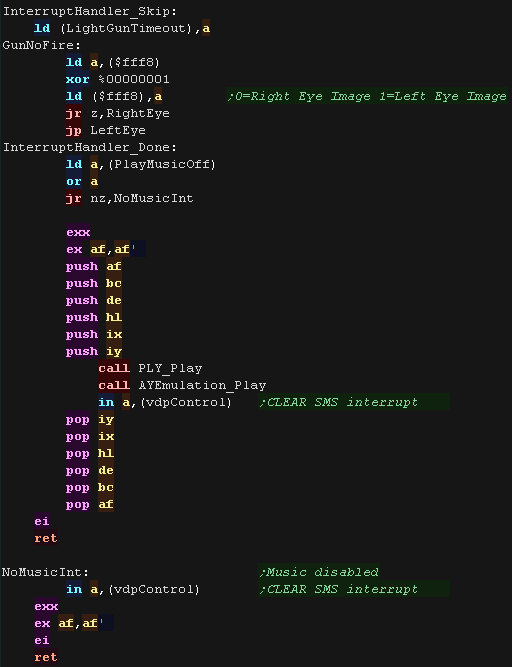
| We'll deal with the 3D eye switching next, Finally we'll finish by updating our music. The music is handled with a tweaked version of ArkosTracker V1 - it needs ALL the registers! we also need to read in the VDP status from the VDP control port, to clear the interrupt |
 |
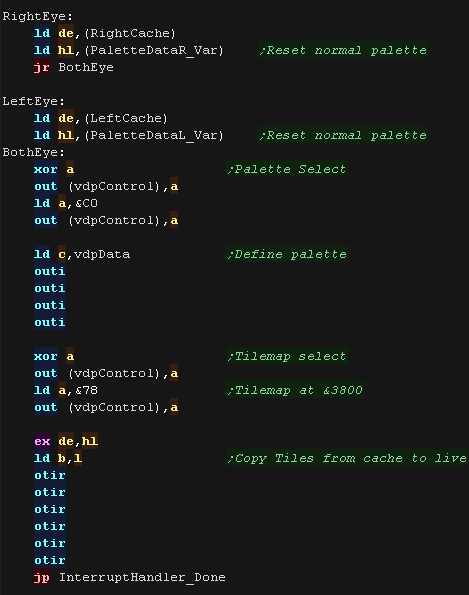
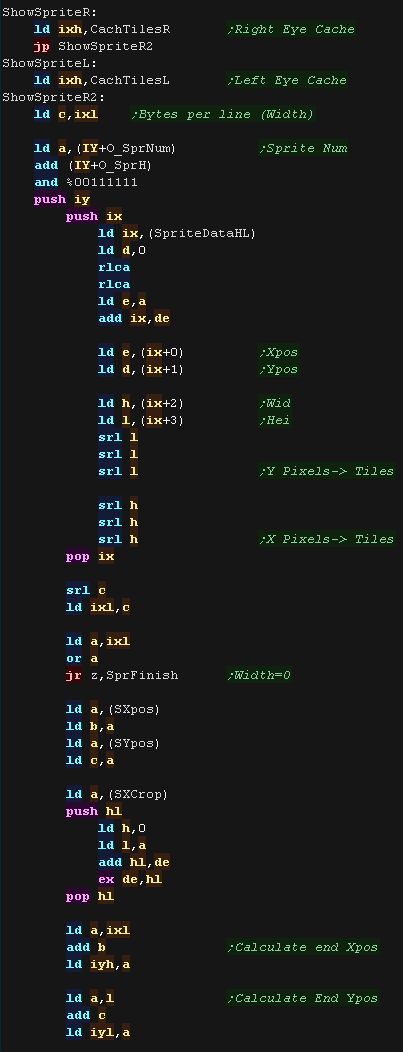
| For each eye, we have a palette and a tile cache. During the interrupt we set the eye's palette, then transfer the &600 bytes (32 x24 x2) of the tile cache to the active tilemap. |
 |
| Pew
Pew! Set Phasers to 'Awesome'! The SMS phaser is one of the best around, and is far better than the 'puny' NES one! You can learn more about programming the SMS Lightgun in this tutorial here |
 |
SMS 'Sprites'
| We use grids of tiles to make
the graphics of our game. Like the other systems there is a 'SpriteInfo' table with a pointer to the sprite data, and a width and height of the sprite in pixels. |
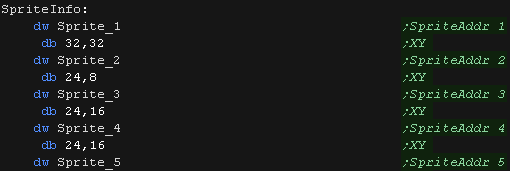 |
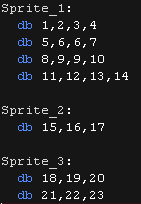
| These sprite pointers point to a mini 'tilemap'. Each tile uses a single byte, UNLESS, the tile is >255, in which case it uses 2 bytes. |
 |
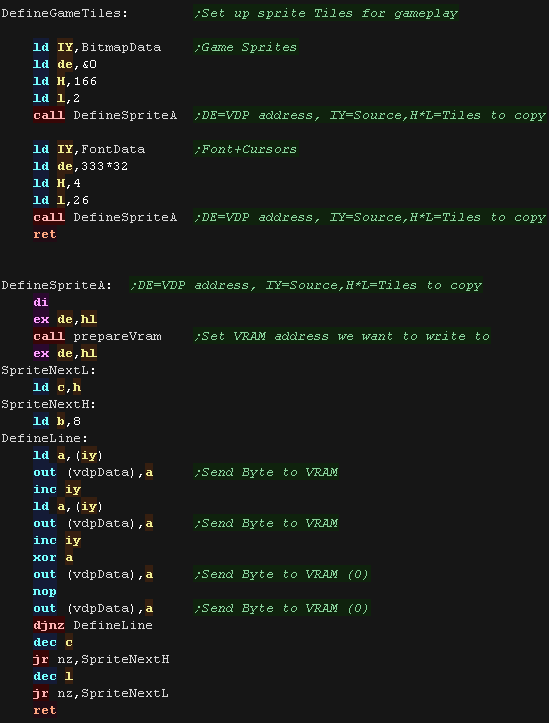
| We need to transfer the tile data into VRAM for our sprites. The graphics in Vram are 4bpp, but we only use 2bpp data in our ROM, so we fill two bitplanes with zeros. Note: The Title screen uses almost all the tiles, so there's not enough left for the font - so we can't show the Highscore on the titlescreen! |
 |
| The ShowSprite Routine loads in the data from the SpriteInfo
table, and coverts the pixel dimensions to a Tile The ShowSprite routine will be passed a logical positition and size. These are represented in pairs of pixels, we need to covert this to a tile number. |
 |
 |
Lesson
SH23 - SMS code Part 2 - Tiles and palettes Lets take a look at the Tilemap (used by the title and gameover), Palette and 3D Switching code of the SMS version of the game |
|
See
SuckHunt
folder
|
|
Intro Animations and title screen
| The intro sequence is as series of 4 x 2 frame animations. They appear in different corners, and colors |
 |
| There is a 'list' of these mini tilemaps used for the intro loop | 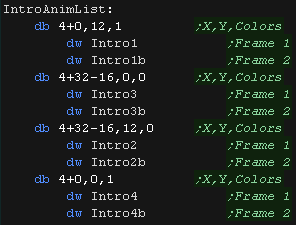 |
| When the intro st The Draw routine loops 4 times. The X,Y pos and Color are loaded from the list, and the address of the first frame tilemap. The first frame is shown while the screen is black, then the fade-in occurs. The second frame is then shown and the screen fades out. |
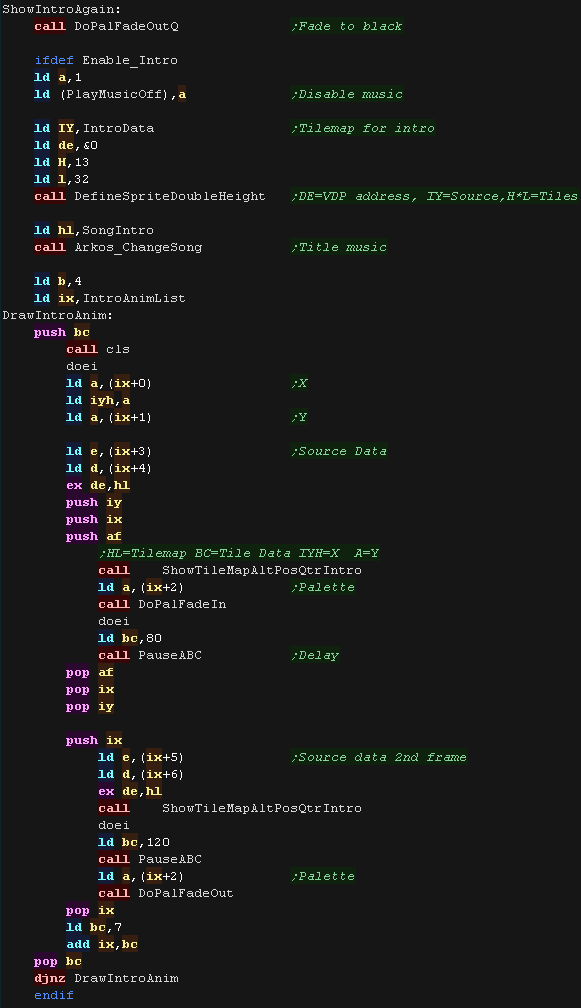 |
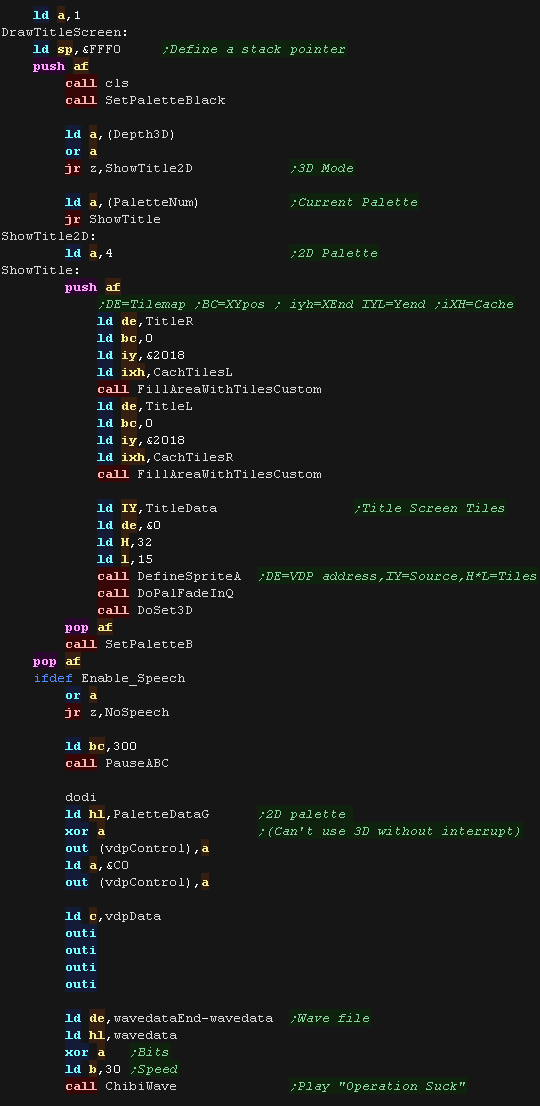
| When the title starts, we show the Title graphic We have to load in the pattern data for the title, and the 2 tilemaps for the Left and Right eye into the tile caches. There is a silly 'Operation Suck' speech sample which is played (a parody of OpWolf) - This uses the 'ChibiWave' Driver we covered in a previous lesson |
 |
Palettes and 3D
| The game has 4 possible palettes - the first is used in 2D mode,
the other 3 are for the 3 different Analgyph glasses we may use. These are made up of two parts, 1. a pointer to the palette (which is passed to the interrupt hander) 2. The palette itself, which is used by the interrupt handler |
 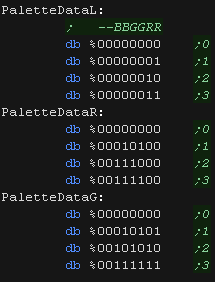 |
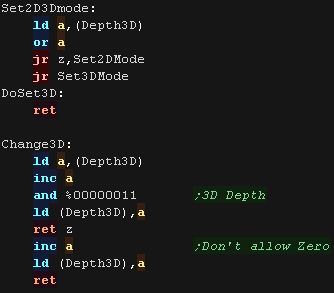
| 3D Depth can be toggled between 4 options: 0 is 0ff, 1-3 are different separations between the two eyes. There are also 4 palettes... 0 is only used by 2D mode, the others are used by 3D mode for the supported 3D glasses 2D mode is enabled by setting the CurrentMode3D byte |
 |
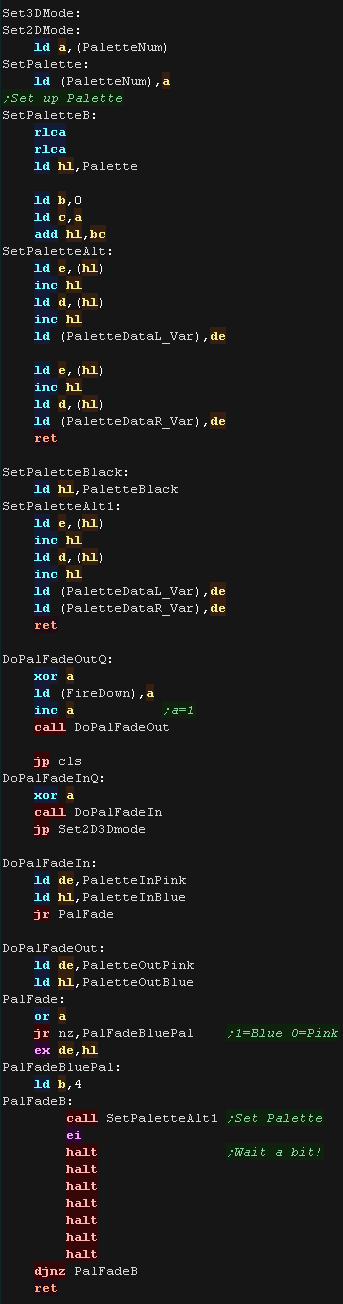
| The SetPalette routine sets the two palette pointers used by
the interrupt handler. Our fade routines also use the same 'SetPalette' routines. There are simply 4 palettes for each of the stages of the fade. DoPalFadeIn/Out routines use A as a palette option 0=Pink 1=Blue... these are used by the Intro routines to set the palette. The last stage of DoPalFadeOutQ is to clear the screen after fading to black. The last stage of DoPalFadeInQ is to set the true palette - enabling the 3D effect. |
 |
| |
Lesson
SH24 - SMS code Part 3 - Main game loop and Title It's time to finish the suck! Lets look at the last of the suck hunt code! |
|
See
SuckHunt
folder
|
|
The title screen
| The Title screen is relatively simple, it waits for the player to
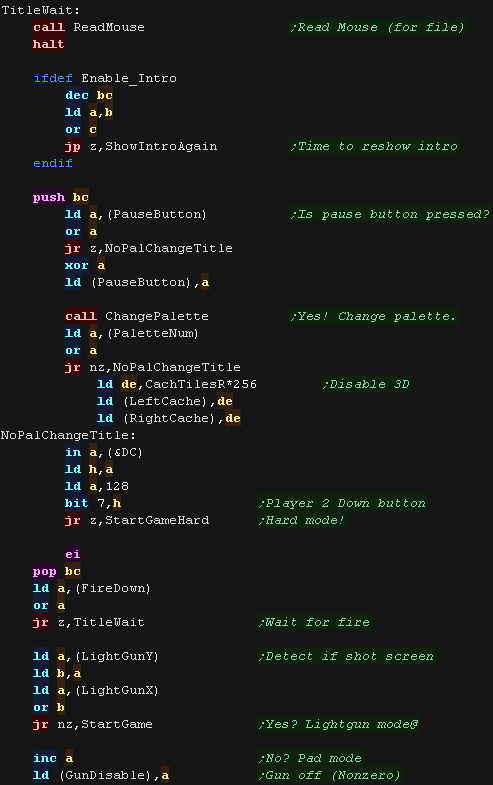
start the game, but it has a few tricky parts! BC is used as a 'timeout' - when it reaches zero the intro shows again. The Pause button on the console toggles the colors (3D Glasses type), 'PauseButton' is set by the NMI interrupt handler. Pressing Down on the second controller can be used to start in 'Hard mode' - this sets the first level to number 128 (in the accumulator) When the player presses Fire, the game starts, but first the 'light gun position is tested, If the lightgun sensor seems to have been pointing at the screen, the gun is enabled, if the sensor could not be detected, lightgun mode is disabled. |
 |
| When the game starts we set the first level number from A We start the main level music, and clear all the game variables to the defaults (NewGameData) |
|
| The Level starts by setting up the sprites (enemies) and drawing
the screen |
|
The main loop
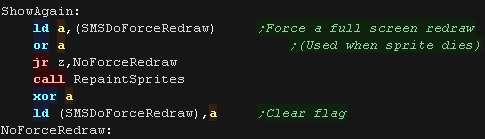
| At the start of the loop, we check the "SMSDoForceRedraw" This allows the SMS to compensate for the lack of an XOR routine... this flag is set when a sprite dies, and the background underneath will need replacing. |
 |
| At the start of the main loop we process input. update the SFX - this updates the sequence of any sound effect. Next we check the Pause button and pause the game if it's pressed. |
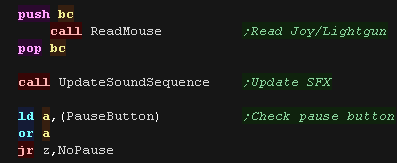 |
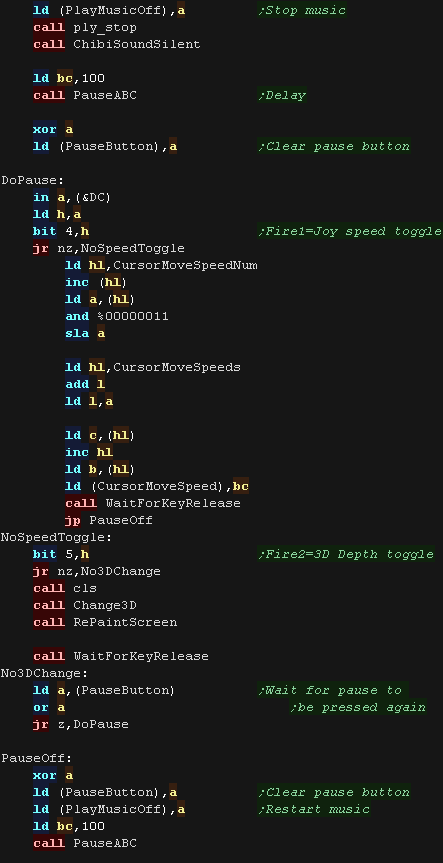
| When pause is pressed we stop the music. We check Fire 1, and toggle the Cursor speed if it's pressed We check Fire 2, and alter the 3D depth if it's pressed. When pause is pressed again, we restart the game. |
 |
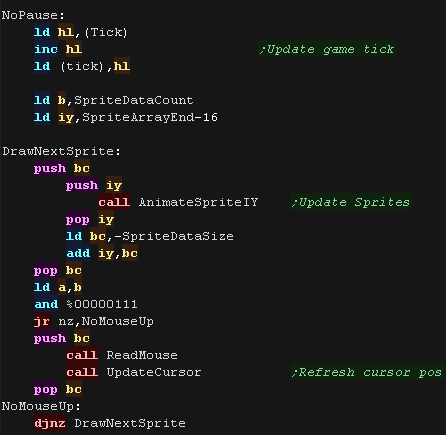
| We update the 'Tick' ... this is used to calculate the updates to
the sprites - as most sprites update every few ticks. We then process each of the sprites, updating their position and Sprite. After every few sprites we check the Mouse cursor, and update it as needed (to keep the cursor movement smooth) |
 |
| The 'Chibigun' (minigun) is a fully automatic weapon, so fires
every few ticks while fire is held... We check the tick, firestate and current gun to see if the Chibigun is firing. |
|
| Next we check fire 2, and reload if required | 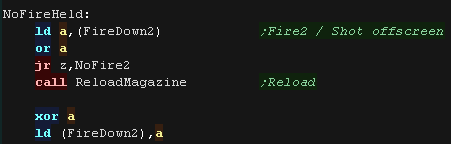 |
| We check fire 1, and fire the regular bullets if required | 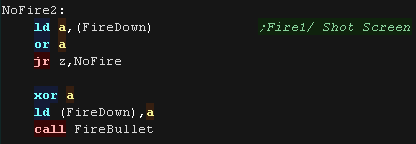 |
| Finally we update the cursor and repeat. | |