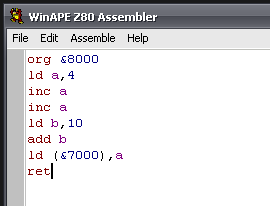
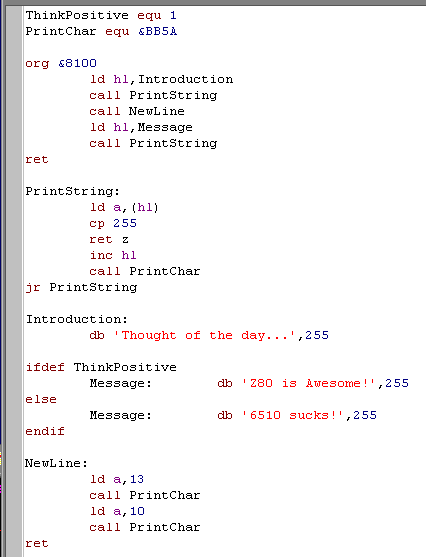
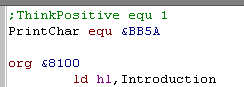
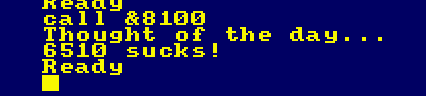
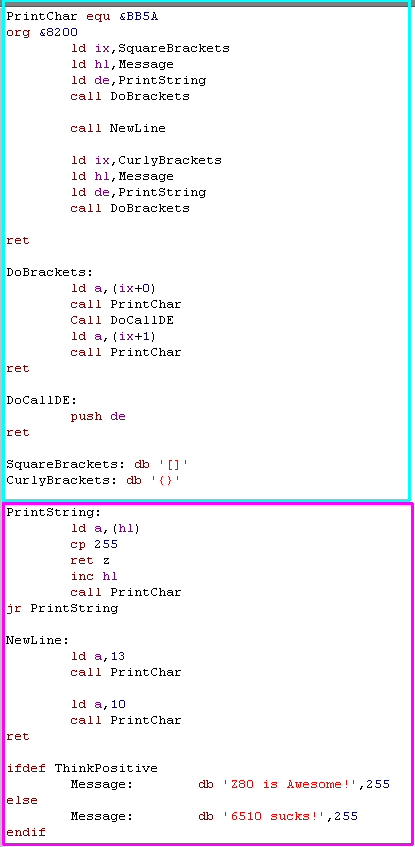
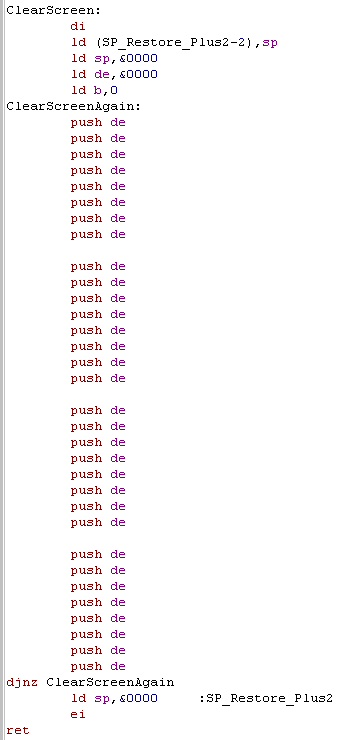
 |
If
you
want to learn Z80 get the Cheatsheet!
it has all the Z80 commands, and useful info on the CPC,
Spectrum and MSX! It will give you a quick reference when you're stuck or confused - and it's what the author used to develop ChibiAkumas! Print it in color at high resolution on 2 sides of A4 for maximum performance! |
 |
 |
The next few
chapters are quite technical and confusing, but if you want,
just skip them for now, and jump
straight into the coding! This tutorial is designed so you can do that! You'll need to know the technical stuff explained below one day, but you can come back to it later when you feel you want to! |
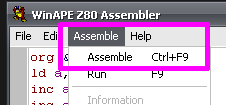
| We'll be using
the excellent VASM for our assembly in these tutorials to build
for everything except the Amstrad CPC... VASM is an assembler
which supports Z80, 6502, 68000, ARM and many more, and also
supports multiple syntax schemes... You can get the source and documentation for VASM from the official website HERE |
 |
Feel the power... of the Z80!
| The Z80 is a 4mhz 8 bit processor from the 1980's... now by
modern standards, it's slow and ridiculously out of date, so why
would you want to learn to develop for it? Well, you can learn a lot about modern computer concepts from the simple Z80, and 4mhz is 4 million commands a second, Which is a heck of a lot when you know how to use them! These old 8 bits give a simple system with a lot of potential for the creative person... and while one person could never create a game up to the standards of the latest 'AAA' titles... you could very easily create a game that's as good or better than the best games of the 80's! |
 |
Whether you're a fan of the CPC, MSX, Spectrum or even the Gameboy these 8 bits have all the power and potential for you to show what you can really do - and you'll learn things doing assembly that you would miss out on with years of C++ or Java development! If you want to make a game with the latest graphics, of course go download Unity... but if you really want to be in control, and to understand everything that's happening in your code, Assembly gives you the power! No operating system, no drivers, you can take control of everything and make anything you want with it! |
 |
| Assembly development can be confusing at first... but it has very few commands to learn, Everyone has to start simply, so try not to compare what you're doing to others... just look at what you're achieving, and knowing however 'simple' what you're doing is... it's something you made yourself! |  |
What is the Z80 and what are 8 'bits'
The Z80 is an 8-Bit processor with a 16 bit Data bus!
What's 8 bit... well, one 'Bit' can be 1 or 0
four bits make a Nibble (0-15)
two nibbles (8 bits) make a byte (0-255)
two bytes (16 bits) make a word (0-65535)
And what is 65535? well that's 64 kilobytes ... in computers 'Kilo' is 1024, because binary works in powers of 2, and 2^10 is 1024
64 kilobytes is the amount of memory a basic 8-bit system can access
Z80 is 8 bit so it's best at numbers less than 256... it can do numbers up to 65535 too more slowly... and really big numbers will be much harder to do! - we can design our game round small numbers so these limits aren't a problem.
 |
You probably
think 64 kilobytes doesn't sound much when a small game now
takes 40 gigabytes, but that's 'cos modern games developers have
gotten lazy! there's no need to worry about making games small
anymore now everyone has 10 TB hard drives... Z80 code is small, fast, and super efficient - with ASM you can do things in 1k that will amaze you! |
Numbers in Assembly can be represented in different ways.
A 'Nibble' (half a byte) can be represented as Binary (0000-1111) , Decimal (0-15) or Hexadecimal (0-F)... unfortunately, you'll need to learn all three for programming!
Also a letter can be a number... Capital 'A' is stored in the computer as number 65!
Think of Hexadecimal as being the number system invented by someone wit h 15 fingers, ABCDEF are just numbers above 9!
Decimal is just the same, it only has 1 and 0.
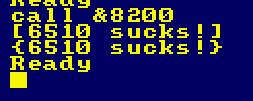
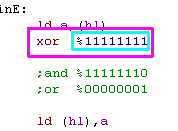
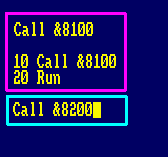
In this guide, Binary will shown with a % symbol... eg. %11001100 ... hexadecimal will be shown with & eg.. &FF.
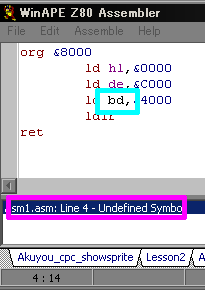
| Assemblers will use
a symbol to denote a hexadecimal number, some use $FF or FFh or
even 0x, but this guide uses & - as this is how hexadecimal
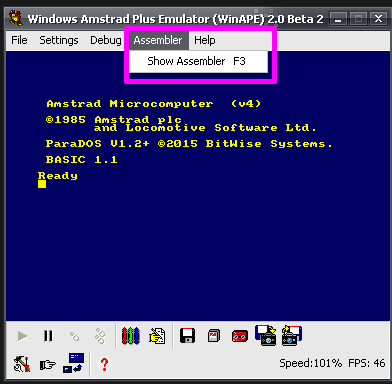
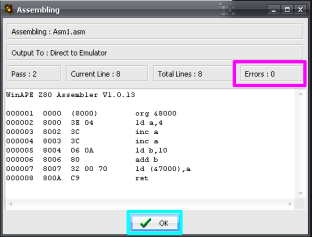
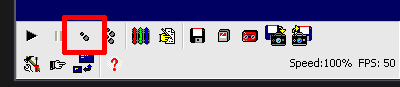
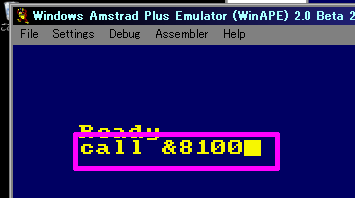
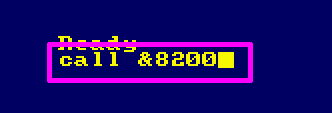
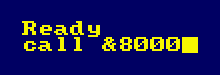
is represented in CPC basic All the code in this tutorial is designed for compiling with WinApe's assembler - if you're using something else you may need to change a few things. But remember, whatever compiler you use, while the text based source code may need to be slightly different, the compiled "BYTES' will be the same! |
 |
| Decimal | 0 | 1 | 2 | 3 | 4 | 5 | 6 | 7 | 8 | 9 | 10 | 11 | 12 | 13 | 14 | 15 | ... | 255 |
| Binary | 0000 | 0001 | 0010 | 0011 | 0100 | 0101 | 0110 | 0111 | 1000 | 1001 | 1010 | 1011 | 1100 | 1101 | 1110 | 1111 | 11111111 | |
| Hexadecimal | 0 | 1 | 2 | 3 | 4 | 5 | 6 | 7 | 8 | 9 | A | B | C | D | E | F | FF |
Another way to think of binary is think what each digit is 'Worth' ... each digit in a number has it's own value... lets take a look at %11001100 in detail and add up it's total
| Bit position | 7 | 6 | 5 | 4 | 3 | 2 | 1 | 0 |
| Digit Value (D) | 128 | 64 | 32 | 16 | 8 | 4 | 2 | 1 |
| Our number (N) | 1 | 1 | 0 | 0 | 1 | 1 | 0 | 0 |
| D x N | 128 | 64 | 0 | 0 | 8 | 4 | 0 | 0 |
| 128+64+8+4= 204 So %11001100 = 204 ! | ||||||||
If a binary number is small, it may be shown as %11 ... this is the same as %00000011
Also notice in the chart above, each bit has a number, the bit on the far right is no 0, and the far left is 7... don't worry about it now, but you will need it one day!
| If you ever get confused,
look at Windows Calculator, Switch to 'Programmer Mode' and
it has binary and Hexadecimal view, so you can change numbers from
one form to another! If you're an Excel fan, Look up the functions DEC2BIN and DEC2HEX... Excel has all the commands to you need to convert one thing to the other! |
 |
But wait! I said a Byte could go from 0-255 before, well what happens if you add 1 to 255? Well it overflows, and goes back to 0!... The same happens if we add 2 to 254... if we add 2 to 255, we will end up with 1
this is actually useful, as if we want to subtract a number, we can use this to work out what number to add to get the effect we want
| Negative number | -1 | -2 | -3 | -5 | -10 | -20 | -50 | -254 | -255 |
| Equivalent Byte value | 255 | 254 | 253 | 251 | 246 | 236 | 206 | 2 | 1 |
| Equivalent Hex Byte Value | FF | FE | FD | FB | F6 | EC | CE | 2 | 1 |
|
All these number types can be confusing,
but don't worry! Your Assembler will do the work for you! You can type %11111111 , &FF , 255 or -1 ... but the assembler knows these are all the same thing! Type whatever you prefer in your ode and the assembler will work out what that means and put the right data in the compiled code! |
 |
 |
If
you
need more help, check out 'Convert.bas' on the tools.dsk in the
sources file... This is a Hex / Bin calculator that's designed to help you see how binary and hexidecimal compare to decimal - it should help you understand how Hex & Bin work! |
|
Working with numbers in the Z80
We know what numbers we can have on the Z80, but how do we work with them?
When we need to save our results, we will store them to that 64k of memory mentioned earlier, but the memory is some distance away from the processor... to be fast we want to use the memory built in to the processor.
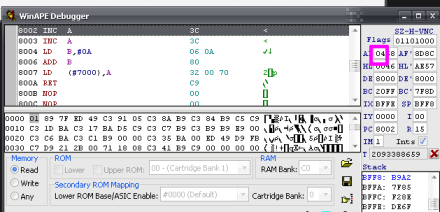
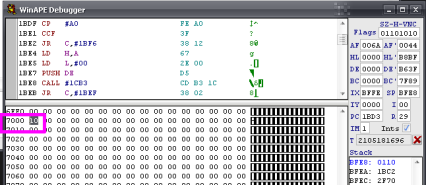
This z80 memory is called the 'Registers'... there's not much of it, but its really fast - so try to use them to do as much as you can! Each Register can only store one byte (0-255)... but some registers can be paired ... so HL together are 16 bits, and can store 0-65535!
Each of the registers has a 'purpose' it is intended for... Of course you can use any register for anything you want! but they all have 'strengths' because many commands will only work with certain ones... and some commands may be slower or need more code if you use the wrong one!
| A | This is used during all our main calculations - you'll use it all the time when adding up (Accumulation)! |
| F |
The Flags � we don�t tend to use this directly, it�s set by mathematical operations, and we respond to it�s contents via conditional jumps and calls. |
| HL | This often stores memory locations, as there are a lot of special commands that use it to quickly read or write whatever memory locations.. it's also good at 16 bit maths, so if you want to add two numbers above 255, you'll probably need it! |
| BC | These are often used as a byte count or loop counter... sometimes you'll use B and C together, for a count of up to 65535, or just B on its own for up to 255... |
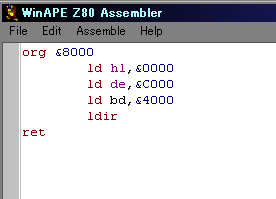
| DE | Destination - if you're reading from one place and writing to another, you'll probably use HL as the source, and DE as the destination |
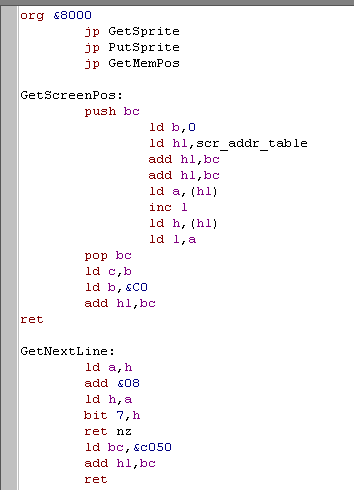
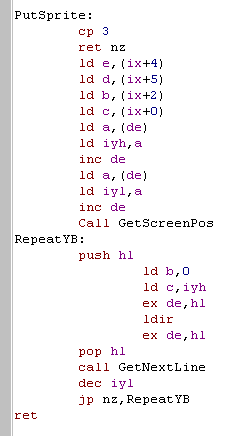
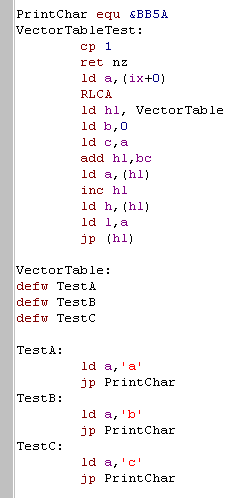
| IX | Sometimes we want to get to memory by specifying a relative
position - Indirect Registers allow us to do this ... for example
if we have sprites, and each 4 bytes for X,Y,Width,Height.. just
point IX to the start of the data for the sprite we want - and
read the rest out as IX+1 , IX+2 etc... Don't worry about this - we'll explain it later... IX is actually a pair of two registers called IXH and IXL - we can use them alone for whatever we want - but they are slower! |
| IY | IY works the same as IX |
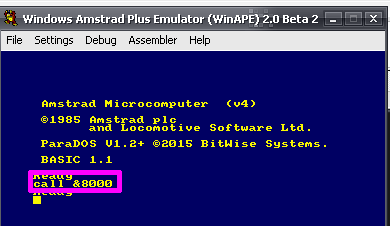
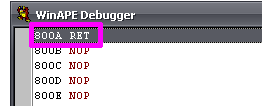
| PC | This is the place in memory that the Z80 is running - we don't change this directly - but CALL, JP and RET all affect it. |
| SP | This is the stack pointer - it points to a big temporary store that we'll use for 'backing up' values we need to remember for a short while |
| R | This is the Refresh register - the system uses it to know when to refresh the memory... don't change it ! you could mess something up - but it can be used for getting simple 'random' numbers! |
| I | This is the Interrupt point... on the CPC and MSX it's pretty useless so you can use it as a 'temporary' store... but on the spectrum it's really important and you'll have to leave it alone! |