Suck Hunt is a little fun game I created in 2020. I had been
doing some experiments with 3D
and
the SMS Lightgun.
|
![]() |
The Game supports multiple 'colors' of 3D glasses, and the depth
of the 3D effect can be changed, it can even be turned off for
boring people! It is controlled with Mouse/Lightgun where available or Joypad During development the game got a bit out of hand, and scrolling, multiple enemies and weapons were added, so a parody 'Operation wolf' introduction was added! (Including speech sample!) The game has 4 weapons, you can reload by shooting offscreen with the lightgun, shooting the HUD, or using fire 2/space... Reloading a full weapon switches to the next weapon. ![]() ![]() |
![]() ![]() |
Merchandise available! You can buy a 'suck hunt' T-shirt or mug from my Teespring store if you want to support my content! Get the game! You can download the game from the website here! |
![]() |
![]() |
Note:
All these addresses are relative to the base address
'UserRam'... this is so the RAM data can be located where
ever free ram exists on the target platform. So the game can work on ROM machines, this is the only writable data, The is no self modifying code or altered data within the other areas of code. |
![]() |
Of course, a
one byte generator could have been used, However this 16 bit one had already had extensive testing while developing Yquest to ensure it produced good random numbers. |
Showing the score
Range Checking
Lesson
SH3 - Gun Routines Suck hunt has 4 guns, each of which has it's own ammo level. Lets take a look at the code which handles them. |
![]() |
See
SuckHunt
folder
|
![]() |
Showing the gun details
Firing the gun!... Pow!
You'll notice that there's
special code for the SMS called 'SetRemoveSprite' and
'SetDrawSprite'. This is because the SMS cannot do XOR, so we need to set the sprite routines to 'blank out' the old sprites. |
![]() |
Lesson
SH4 - More Graphics routines Lets take a look at more parts of the multiplatform suck hunt code! |
![]() |
See
SuckHunt
folder
|
![]() |
The Life bar
The Bullet Count
The bullet count is shown in the centre. There are two lines. The top line is the text label. The bottom line shows "Loaded / Total" bullets onscreen. |
![]() |
Draw Cursor
Repaint Screen
Sprite Cropping
Sprite Settings
Sprite Initialization
Drawing a sprite
Character routines
Suck hunt uses the platform specific sprite routines to draw
characters, so the font is also 3D, with X,Y and Z Our printing routines use char 255 termination, and we have different versions of the functions for Location on 2 aixs, 3 axis, and to locate and print in a single command to save time. |
![]() |
Sound Sequences
Lesson
SH7 - Sprite Animation When each sprite movement tick occurs, we need to update the sprite according to it's 'rules' This defines each enemy as unique |
![]() |
See
SuckHunt
folder
|
![]() |
Moving the sprite
Sprites offscreen
Dead Sprites
When a sprite is dead (When bit 7 of it's 'program' is 1), it's
'Life' count actually marks the ticks remaining until it respawns. Each tick the 'Life' is reduced - when it reaches zero, the code which respawns that object is executed. |
![]() |
The enemy objects all have their own 'init' subroutine... we'll
see them in a moment. The 'AnimateDeadSprite_ReanimatedWithSound' function brings the object back to life (clearing bit 7 of the program) and making a beep! |
![]() |
Power up objects (the 4 guns and the life can) have special rules! They always appear in the foreground, near the bottom of the screen, and they always appear at the 'edge' of the screen, Either far left, or far right (depending on the level) They have a 'life' of 1 - this means one shot 'collects' the power up. |
![]() |
Background objects can't actually be shot, but they need a
non-zero life. They don't actually change their Y or Z position, they just appear in the same position on the opposite edge of the screen they left! |
![]() |
Re-animating an object will usually end with making a 'beep' to announce the return of the enemy, and finally clearing bit 7 of the program - to set it as 'alive' | ![]() |
Chibicorona's always appear at the very top or bottom of the game
window in the foreground, though they appear at any horizontal
position. They only take one hit, but come back very quickly ![]() To set the Y position, a random number is picked, and the Ypos and Sprite are set, depending if its greater than, or less than 128 |
![]() |
Before we position an object, we can use 'CheckObjectPos' This stops two objects having the same X,Y position - Because we're using XOR, two enemies in the exact same position will be invisible - especially a problem for ChibiCoronas who do not move! |
![]() |
Chibiko is the 'boss'... she has a lot of life, but is otherwise
just another bat enemy. The 'ScaleUpLifeC' will increase the amount of life the enemy has, depending on the current level ![]() |
![]() |
The two basic bat enemies are the same, the only difference is
their amount of life.![]() |
![]() |
Here's the life scaling routine. it increases the life depending on the top 4 bits of the level (there are only 16 defined levels that repeat indefinitely) | ![]() |
Game Over
The Game over screen is a little tricky!... essentially it's a
tilemap graphic (saves memory over a raw bitmap) with some text. The trouble is, it has to work in 2D and 3D modes! In 16 color mode the 3D version is used for both, in 2D mode we just palette switch 'Hiding' 12 of the colors... in 4 color mode we have two version of the graphic, one 3D and one 2D On the SMS we use shutterglasses and we actually use two tilemaps - one for each stereoscopic eye |
![]() |
First we make the gameover sound and fade out the screen | ![]() |
on the SMS we need to draw the two tilemaps to the screen (CacheR
and CacheL are the right and left tilemap buffers) |
![]() |
The CPC has different tilemaps for 2D and 3D. The 3D effect is precalculated in the Tilemap patterns, so we draw this in 2D mode. |
![]() |
When we're using the 3D Tilemap for both systems, all we change is
the palette - we use palette 4 in 2D mode, this sets all 16 of the
colors to 4 shades of Grey - disabling the 3D effect. the SAM coupe version has the data in an alternative bank... The MSX2 version needs an alternative Ypos for the tilemap data. |
![]() |
We've drawn our graphic, now we draw our text messages | ![]() |
Next we check the highscore. If we've got a higher score this time we update the highscore and show a message. These are the same routines as Yquest and Grime used We pop a value out of the stack - this is the correct palette to use after the fade in |
![]() |
We delay a while on the gameover screen and fade out. We then restart the game at the title screen... setting A=0 stops the 'Operation Suck' speech sample! |
![]() |
Level Definition (Recap)
Level Init
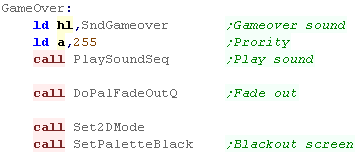
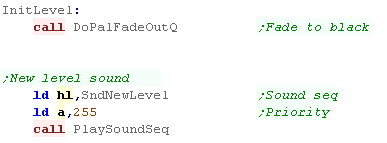
At the start of a new level we first fade out, and play the 'new
level sound' |
![]() |
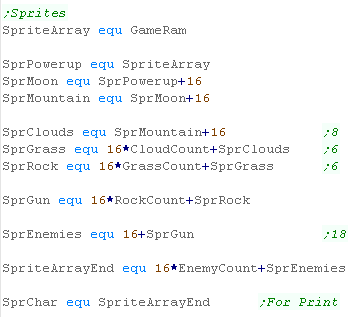
We clear the sprites data to zero - this ensures the ram data
starts from a constant position irrespective of anything left over. |
![]() |
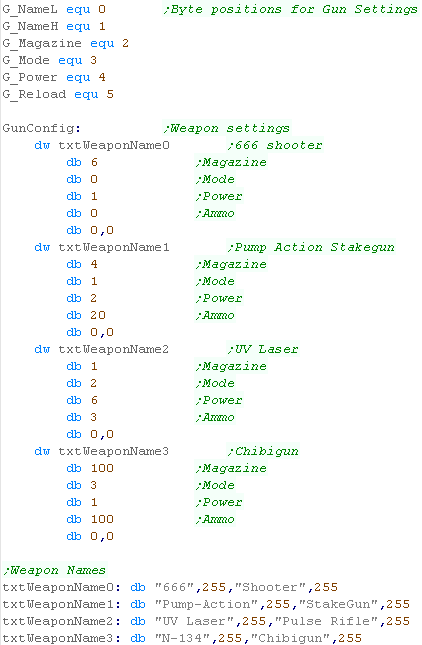
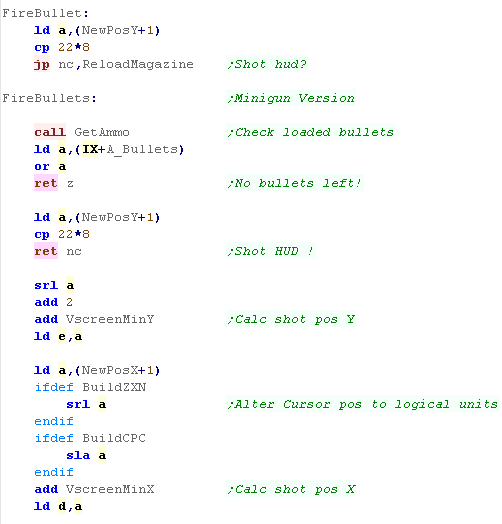
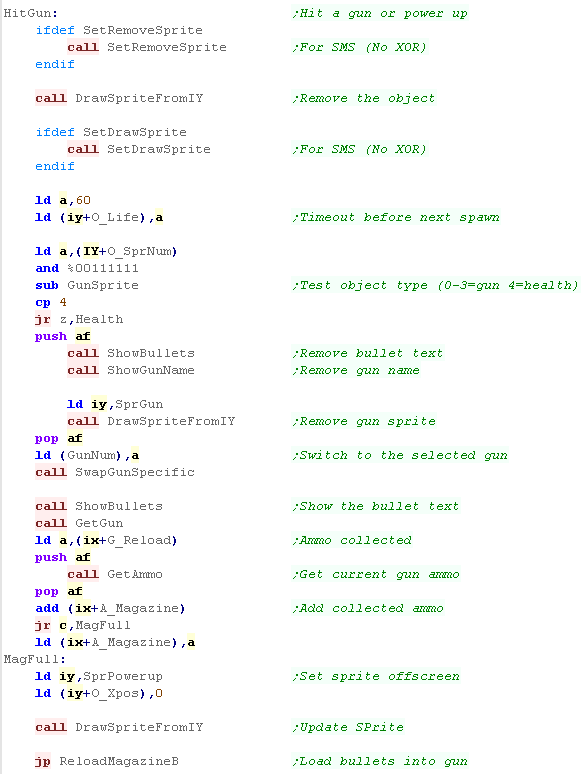
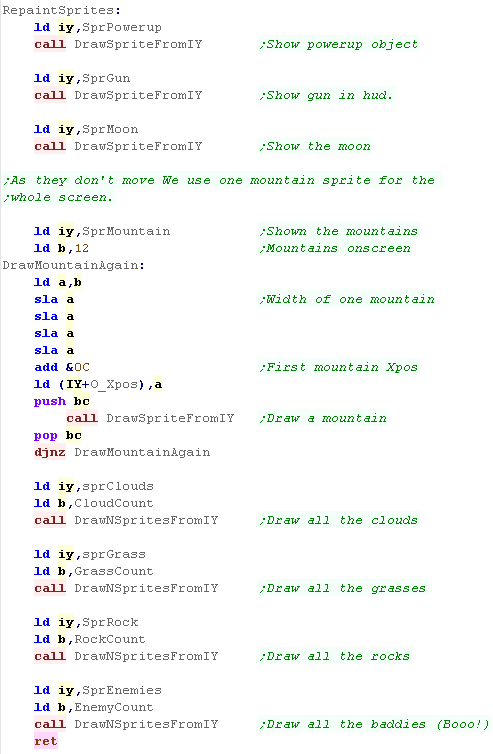
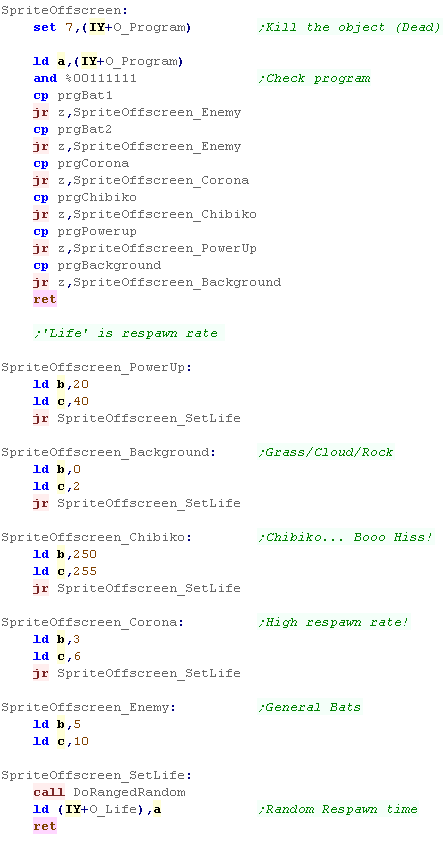
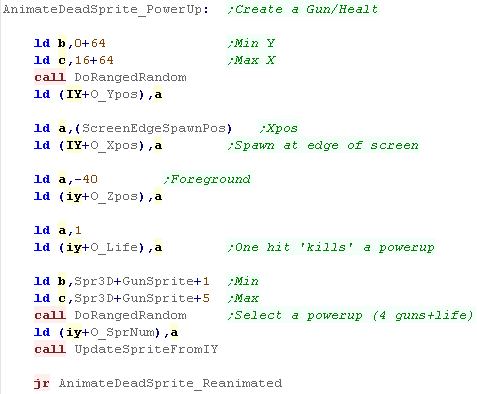
We first define the 'powerup' object - this is the collectable
onscreen item, it can be a health bonus, or one of 4 guns (which is
decided on respawn) |
![]() |
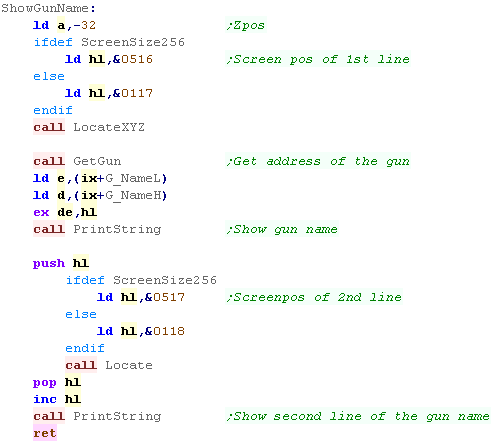
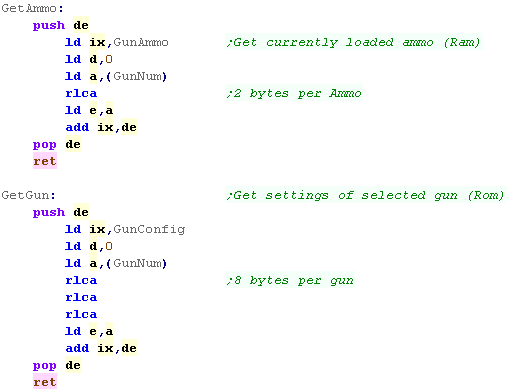
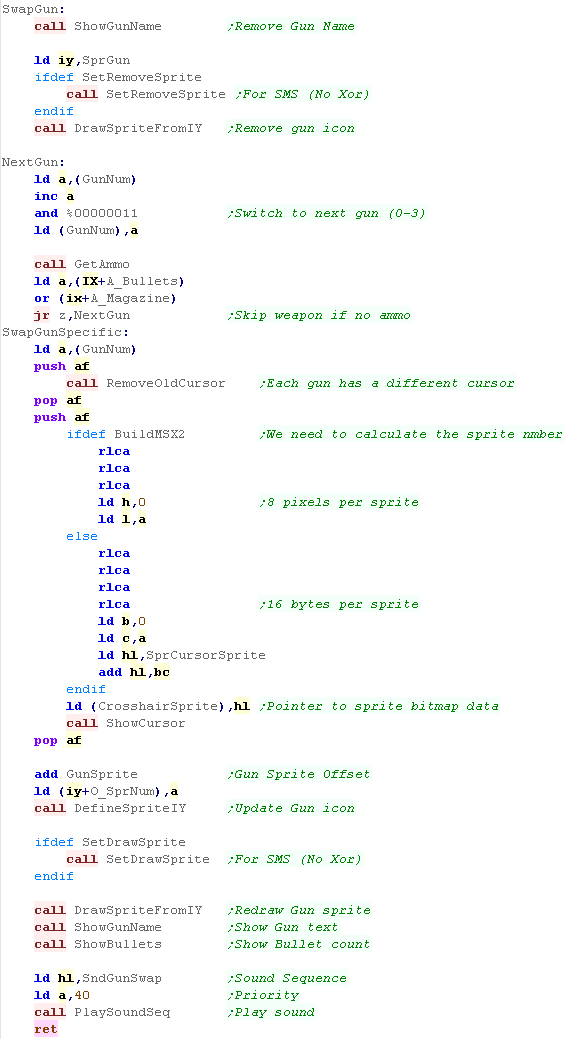
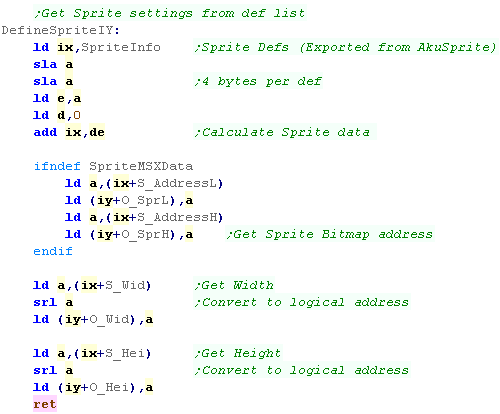
We initialize the Gun - this is not the powerup, but the icon in
the HUD. We use DefineSpriteIY to recalculate the size and address of the sprite based on the selected gun. |
![]() |
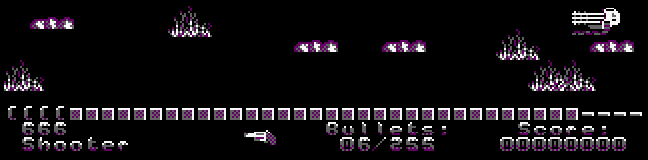
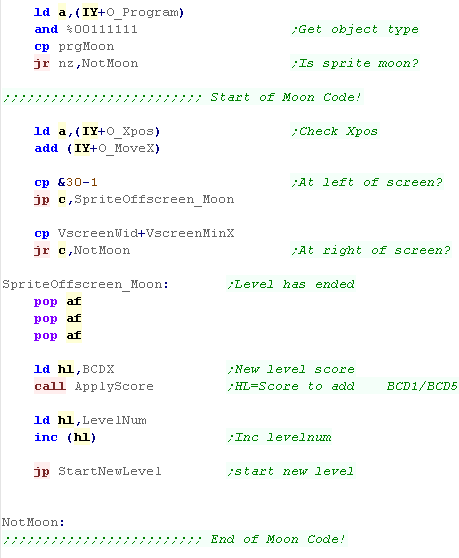
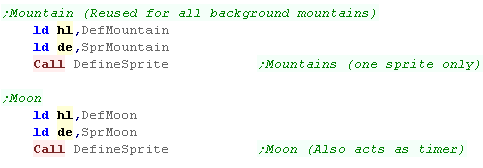
We set up the mountain object - this is used to draw the
background mountains, one sprite is used for all the mountains. The moon is the level time - it will need some more setup later. |
![]() |
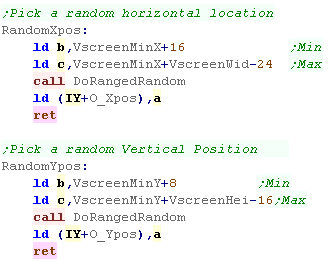
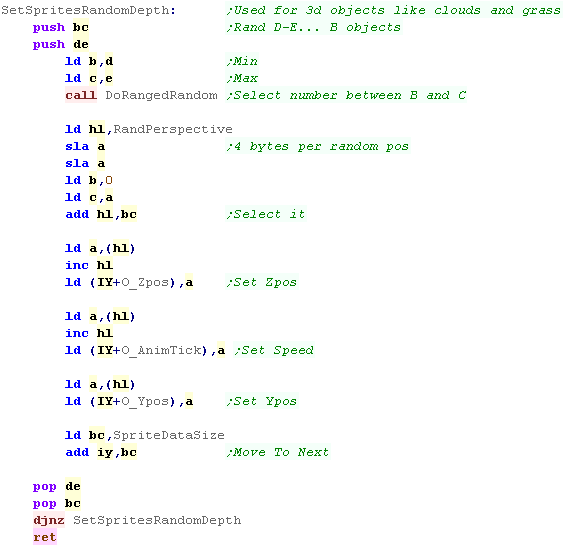
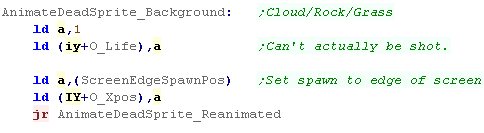
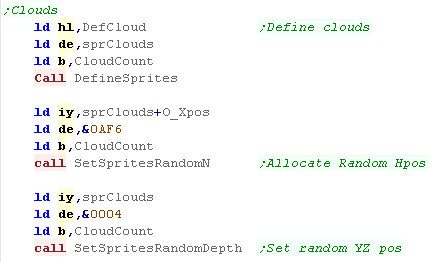
We define the cloud sprites. These all have a random Xpos... and a random Y/Z pos, but all only appear at the top of the screen. |
![]() |
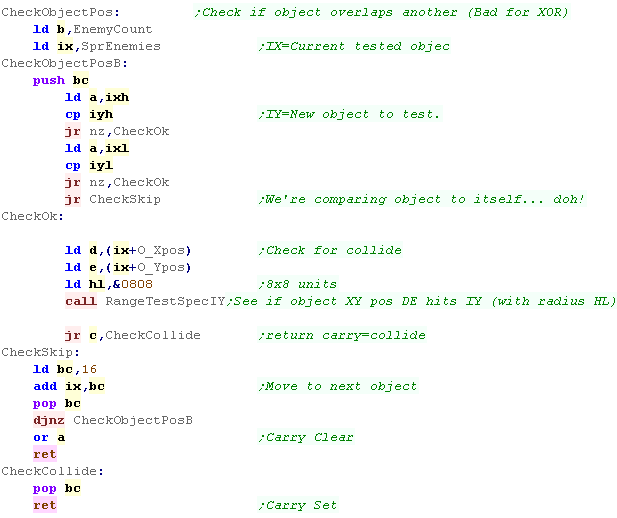
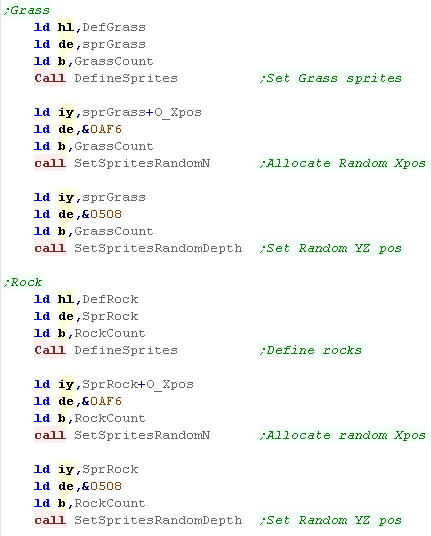
We do the same for rocks and grass, but these are at the bottom of the screen. | ![]() |
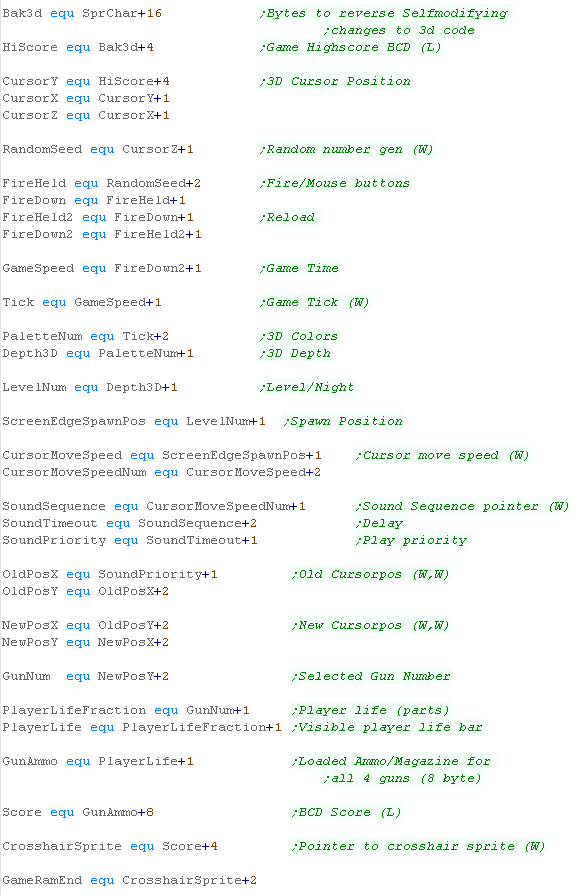
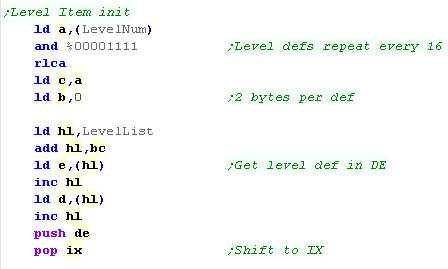
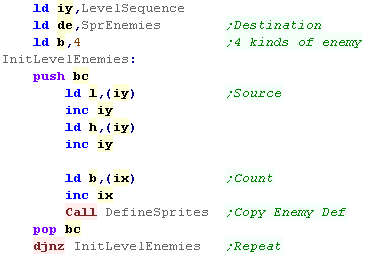
We have a bank of definitions for the 16 levels. We load an address from the "level list". This is the pointer to the 6 byte definition which defines the basic enemy counts, and level speed |
![]() |
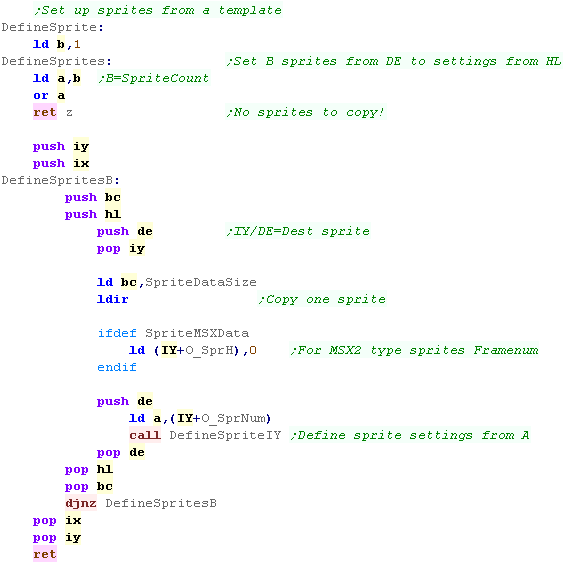
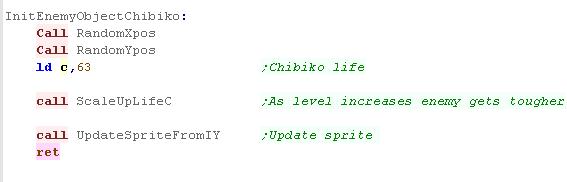
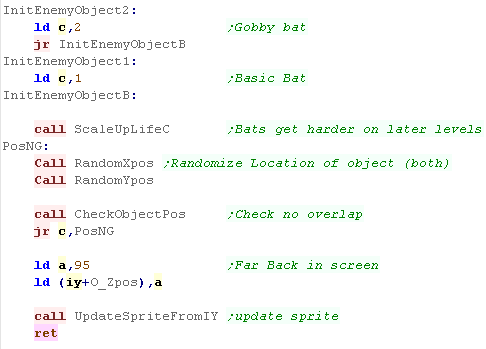
We load the definition of each of the 4 enemies, and create the specified number of that enemy using DefineSprites (B can also equal zero) | ![]() |
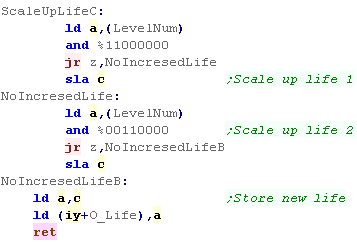
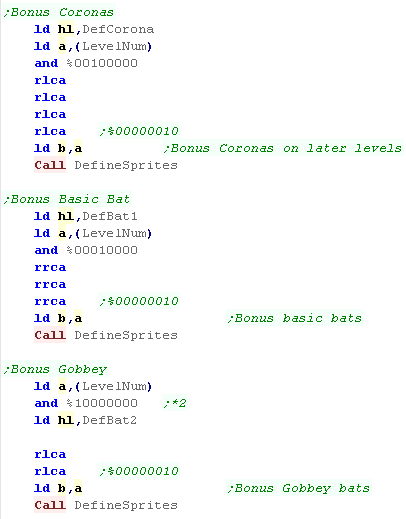
The game has 256 levels, but we've only defined 16... to 'make up'
the difference, there are some routines which automatically add
extra 'bonus' enemies in later levels, based on the top 4 bits of
the level number. This makes the game play in 'waves' of 16 levels, getting harder and harder up to level 15, before easing up, but with a few extra low level enemies at the start of the next wave. |
![]() |
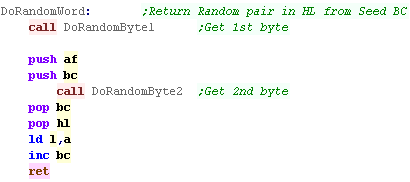
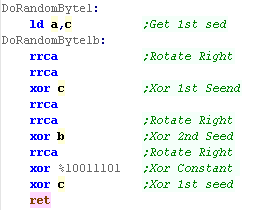
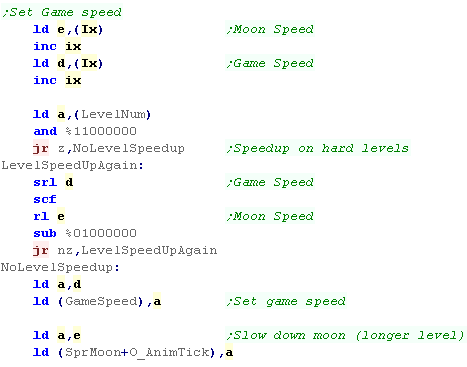
We need to set the game speed... there are two elements to this 'Game Speed' is how fast the level updates (enemy speed), lower numbers update the game more often so the play is faster 'Moon Speed' is how fast the moon moves across the screen, when the moon leaves the screen the level ends, so the slower the moon, the longer the level. Again, these are altered automatically for later levels, making enemies faster and levels longer. |
![]() |
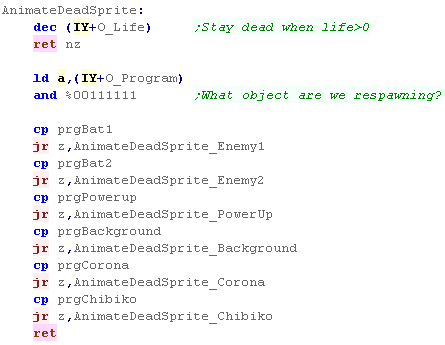
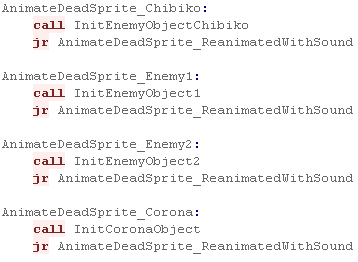
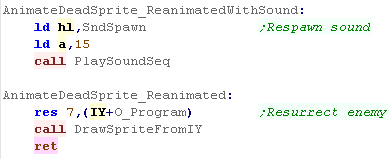
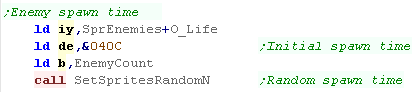
We've defined all our enemies, but we want them to enter the level
at different times, To do this we give them all different spawn times... defined by the object 'life' |
![]() |
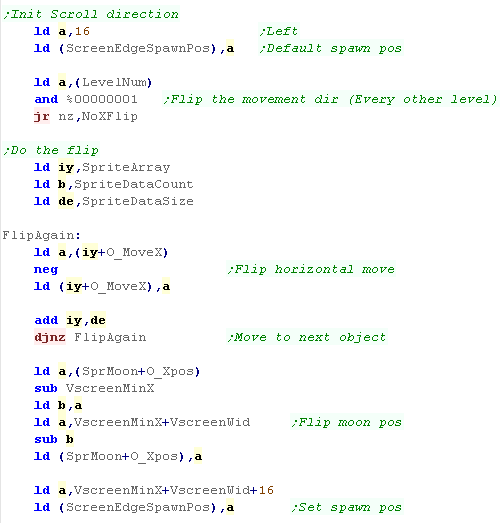
Half the levels scroll left, the other half scroll right... this
alternates every level. Every other level we 'flip' the defined move direction and start moon pos. 
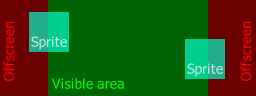
We also define "ScreenEdgeSpawnPos" this is the far edge of the screen, and is used for spawning powerups. |
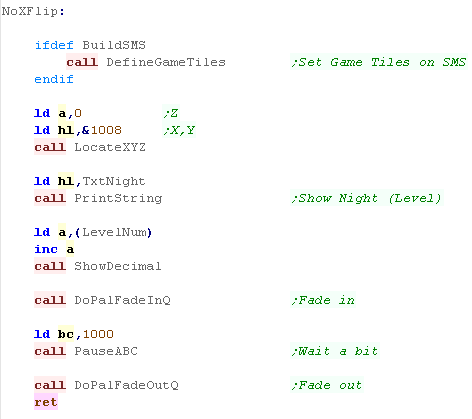
![]() |
Phew! We're done... 
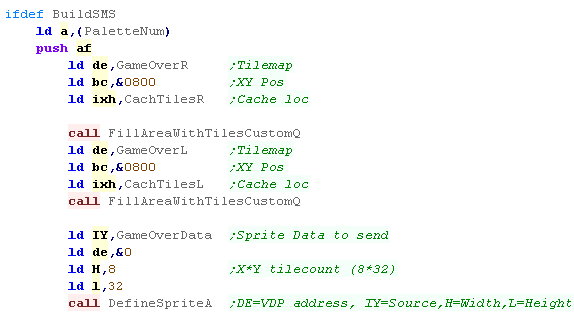
On the SMS we need to define the level tile patterns. We show the 'Level number' (Night), and pause and return. |
![]() |
Pause
As a bonus(!) we have a crude pause routine. It delays a bit, while updating the SFX. Actual sound playing is handled by the interrupt handler. |
![]() |